Emergency sessions allow you to generate a list of anyone signed into your sites allowing you to act faster during evacuations as you’ll know who needs to be located and marked as safe.
If you have been invited to the VisiPoint dashboard for a company, you can start or join an emergency session from the VisiPoint app for that company.
You must have been given the role of Admin or Fire Warden to access the emergency list feature. You can learn about roles and how to set them in this article.
NOTE: You’ll also be able to activate an Emergency Session by signing into the dashboard on any device with a modern browser or on your kiosk. To view a guide on how to use Emergency Sessions on the dashboard click here, for an article on using this on your kiosk click here.
Starting an Emergency Session
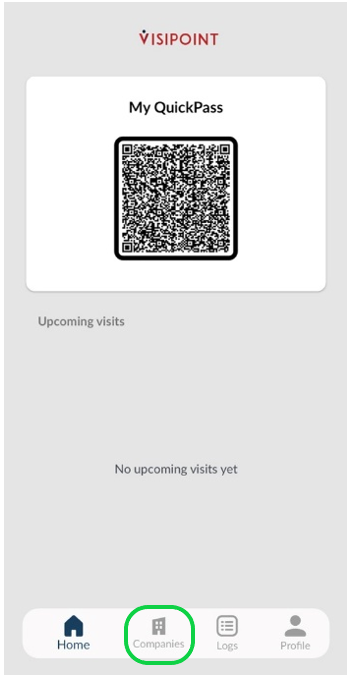
Once you have opened the app, you will see the “Companies” tab at the bottom of the screen.
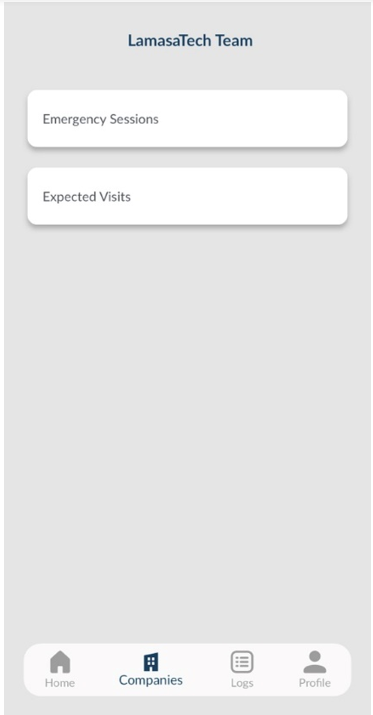
Tapping this will bring you to the screen below.
From here, you will need to tap the “Emergency Sessions” button.
NOTE: If you have been invited to manage multiple dashboards you will need to first select the company you wish to start, join or view past Emergency Sessions for.
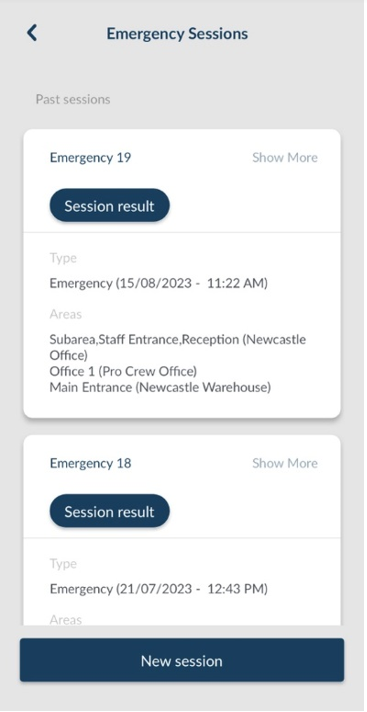
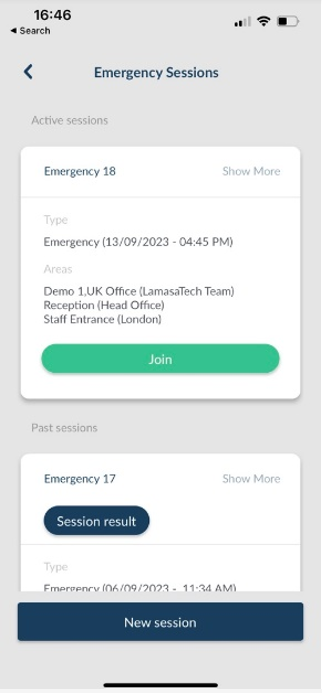
Here you will see a list of previous Emergency Sessions. You can tap these to view their details.
To begin a new session, tap on the New Session button at the bottom of the screen.
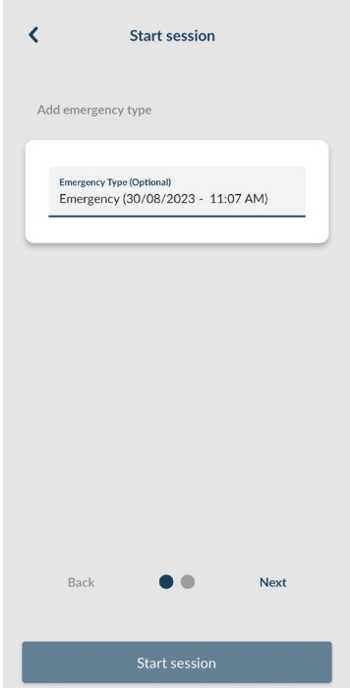
You will then be brought to this section, where you can rename the Emergency Session. By default, the name will be set as the current date and time.
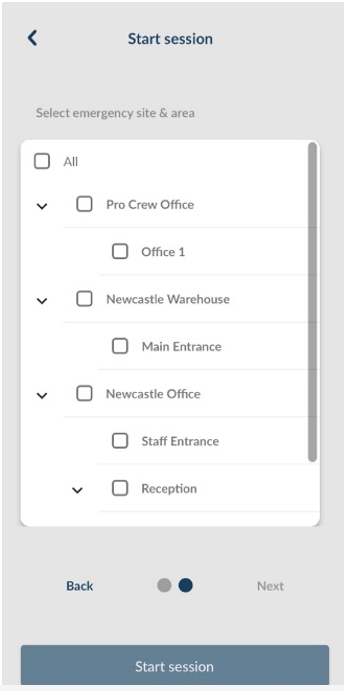
Tap next to begin selecting the details of your Emergency Session. Here, you will need to select the areas the emergency is taking place. You can either select specific areas or you can select them all.
NOTE: If you were to select one area you will find any sub areas within there will be selected as well. Tap All for all areas.
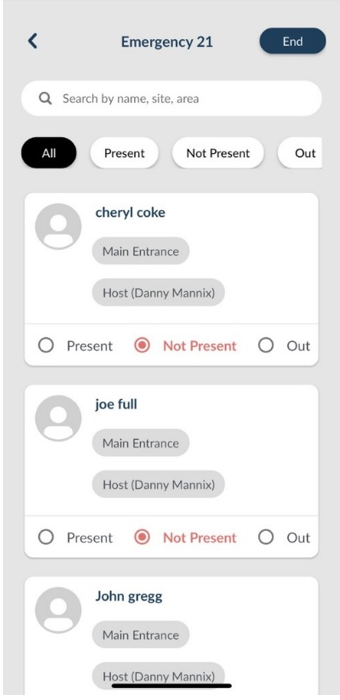
Once you have selected the appropriate areas, tap “Start session” You will then be shown a full list of everyone signed into your selected areas.
Joining an Existing Emergency Session
You can also join a currently running emergency session.
To do this follow the same process as above by selecting Companies from the home screen and then pressing Emergency Sessions.
You’ll then see an existing session at the top of the list if there is one currently running.
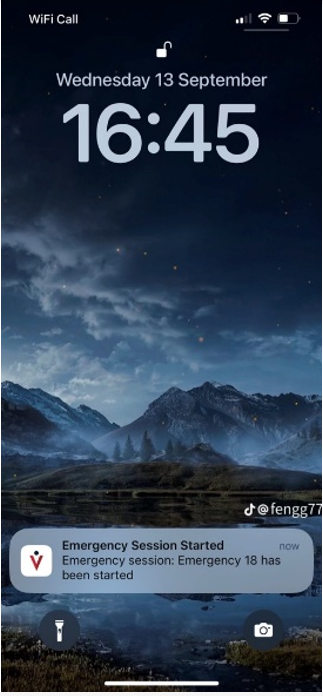
You will also receive a push notification on your mobile device when someone else starts an emergency session.
Using the Emergency List
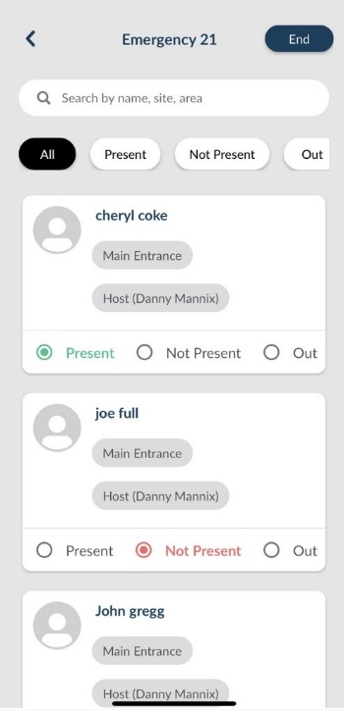
Once the list has been generated you will find that everyone has the “Not Present” status. As you locate people from the list you can mark them as “Present”. If you know someone has left the site you can mark them down as “Out”, they may have forgotten to sign out when they left and that is why they are still showing on the list.
Once you have changed the status of an individual, this will also be updated for anyone else who has joined this emergency session.
You can also filter the list by selecting either “Present”, “Not present” or “Out” at the top of the list. You may wish to do this to narrow the list down as you mark your peers down as Present.
Finally, you also have the option of searching for a specific user by typing their name into the search bar at the top of the page.
Once you have completed the Emergency Session, simply tap End in the top right. This session will then be made available to view in the Emergency Sessions list.

