[blank_space height=’3em’]
We’re excited to announce our latest product update which kick-starts our release schedule for 2019, jam-packed full of updates and shiny new features to make your organisation safer and your processes run like clockwork.
Emergency List Revamp
[blank_space height=’3em’]
[thrive_highlight highlight=’#b90e00′ text=’light’] Key takeaway [/thrive_highlight] – Filter and sort your emergency list for quick and efficient roll-calls.
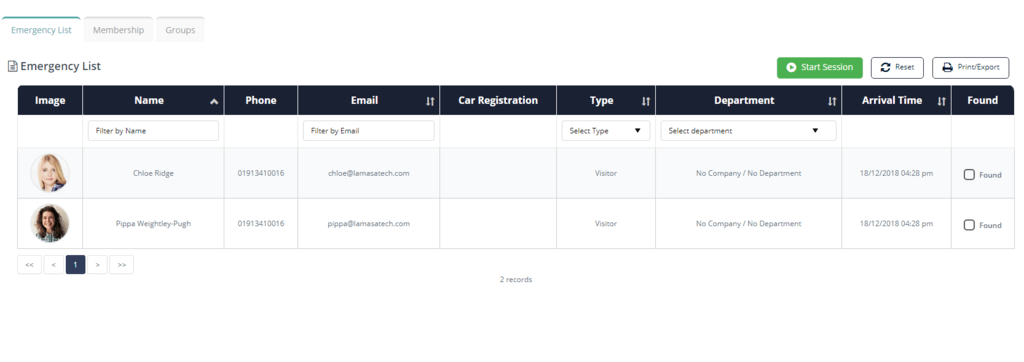
The emergency list has had a significant revamp to make the roll-call process even more efficient. You can now filter and sort the columns easily, for example sort the list of names alphabetically or sort by status of found or not found. Plus you’ve got the photo from user profiles on the left-hand side for quick identification.
You can read more about how to use the emergency list feature in our Knowledge Base tutorial.
[blank_space height=’3em’][divider style=’full’]
Emergency Sessions
[blank_space height=’3em’]
[thrive_highlight highlight=’#b90e00′ text=’light’] Key takeaway [/thrive_highlight] – Action roll-calls with multiple fire marshals working through the list in unison with real-time sync.
With our brand new Emergency Sessions multiple devices can be used in unison to carry out a roll-call. For example, if you have one fire marshall at the main exit and another at a secondary building they can use the emergency list from 2 devices at the same time, and the list will update in real-time. Once you close that session it will be logged and you can access the roll-call history from that session at any time.
[pullquote align=”normal”]During Health & Safety audits or Ofsted inspections this is a really powerful tool to demonstrate your robust safety processes. [/pullquote]
You can read more about how to use the emergency sessions in our Knowledge Base tutorial.
[blank_space height=’3em’]
[divider style=’full’][blank_space height=’3em’]
RFID Sign-In for Students
[blank_space height=’3em’]
[thrive_highlight highlight=’#b90e00′ text=’light’] Key takeaway [/thrive_highlight] – Pupils can now be given access cards or fobs so they can tap their card on the VisiPoint device to sign in or out in seconds.

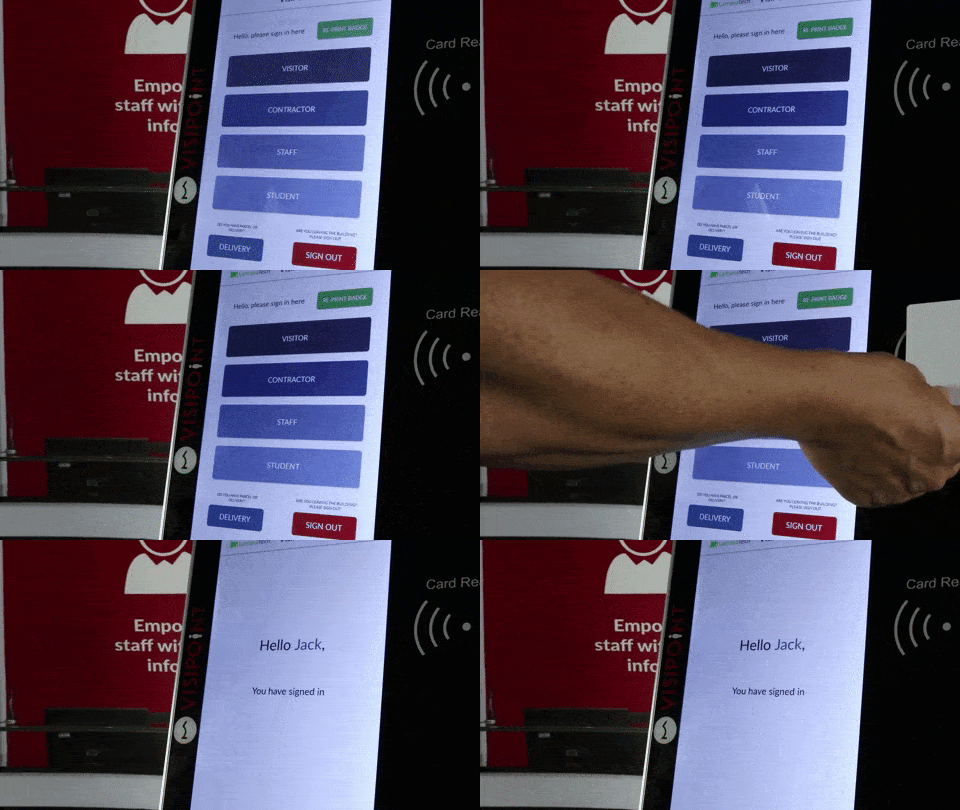
We’ve extended the RFID sign-in functionality so it can now be activated for students too. Pupils can now be given access cards or fobs which are set-up to be read by VisiPoint, meaning they can tap their card on the device to sign in or out.
It’s a huge plus for schools that have year groups which are allowed to exit the school for free periods or other commitments, giving you more accurate tracking of their comings and goings.
Learn how to set up RFID for students in our Knowledge Base tutorial.
[thrive_text_block color=”green” headline=”Example”] 6th form students can be given cards which allows them to sign in and out in seconds. The admin team won’t get bogged down trying to keep track of student activity in case of a fire drill, and all that’s required of students is to tap their card as they exit and enter buildings. Everyone’s happy – and safe![/thrive_text_block]
[divider style=’full’][blank_space height=’3em’]
School MIS Update and Staff Sync
[blank_space height=’3em’]
[thrive_highlight highlight=’#b90e00′ text=’light’] Key takeaway [/thrive_highlight] – Your staff list can now be synced from your MIS and you have advanced control over your data sync.
With the latest update to our MIS integration you can now sync your staff list from your MIS to VisiPoint – eliminating the need for you to import your staff list and edit staff profiles in VisiPoint with any updates.
The ‘School Integration’ button has been removed from the top of the dashboard and replaced with the ‘Wonde Integration’ sub-menu in the navigation the left-hand side of your dashboard (Wonde is the solution we use to automate the real-time integration.)
The Wonde configuration section now gives you full control over your data sync. You can select which data list pulls from your MIS and which user type (Staff, Student, 6th Form etc) this syncs with in VisiPoint, as well as choosing whether the sync is read and write, or read only. If write cannot be selected this means the write integration is not available for that set at this time – such as the staff list as this is a read only integration at this time.
For a full tutorial on using the MIS Integration, visit our Knowledge Base tutorial.
To set up the sync with staff list from your MIS system, please email our tech team on support@visipoint.net and we’ll walk you through this. [blank_space height=’3em’]
[divider style=’full’]
[blank_space height=’3em’]
We’re really happy with these updates, and we know you’ll like them too.
If you have any questions or feedback, you can get in touch on +44 (0) 191 341 0016. We’re always happy to hear from you.
[blank_space height=’3em’]

